I don’t know about you, but we have been trying out best to stretch our stockpile and avoid going to the store. My freezer is usually stocked with frozen meals such as lasagnas, chicken pot pies and soups. We’ve been eating about 2 of those meals a week to stretch our grocery trips and it’s freeing up a lot of room in my freezer. I’ve had many moments where I think to myself “Wow! I didn’t know I had this in here!” I have found some gems, like frozen mixed berries and frozen cookie dough balls. I have also found about 5 bags of half eaten frozen vegetables. None of the bags really had enough to cook and feed my husband and I for a meal so I was left trying to figure out how to use them. Then I remembered a recipe that my in-laws make for a delicious vegetable soup.
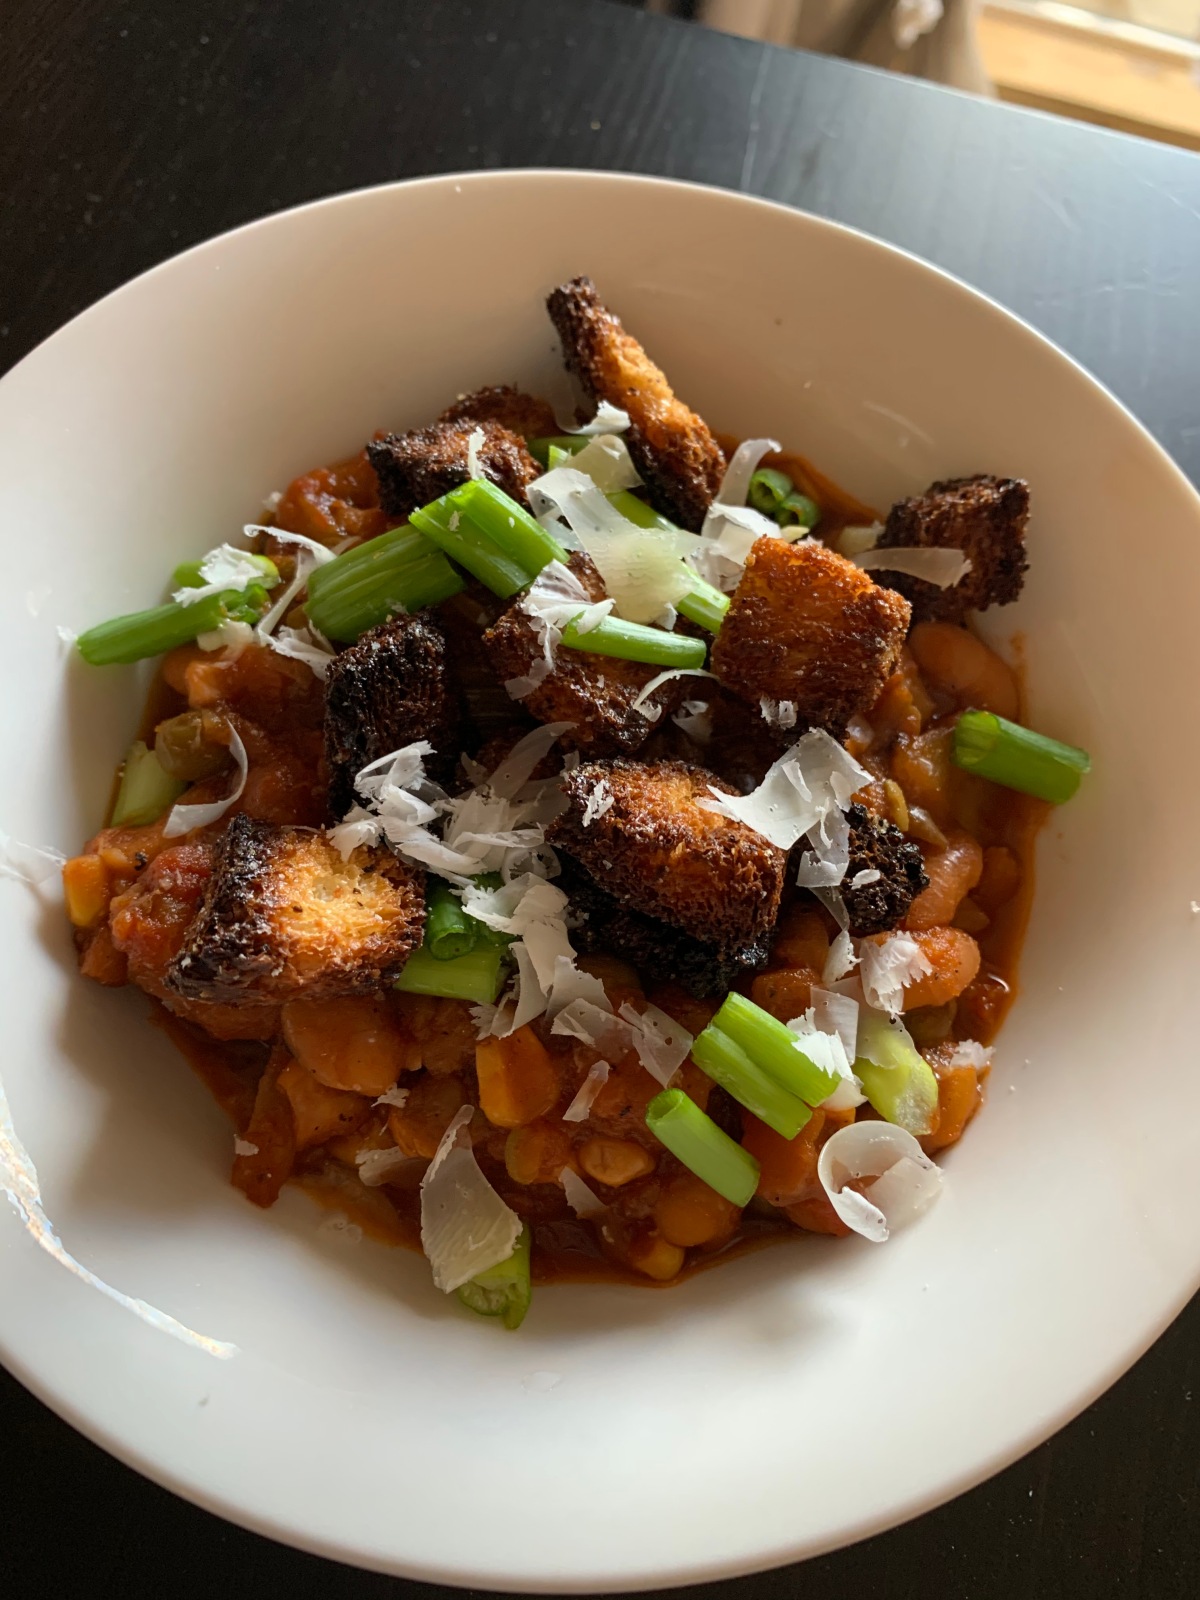
Their soup has a rich and thick tomato base, reminiscent of a chili. I figured all of the frozen veggies would be great in the soup so I called them to have them refresh my memory on the basics for the recipe. Luckily I had the canned tomato products on-hand and I was able to make the soup using up leftover items in my freezer and pantry.
Below is the recipe, but it’s really just a road map for you to adapt to what you have on hand. They use lima beans in their soup that I believe are frozen. I didn’t have any so I used dried navy beans instead. Since I was using dried beans, I cooked my soup in my electric pressure cooker but you can totally simmer this in a large stockpot on the stove if you’re using cooked beans. Use what you have on hand and clean out your freezer!
We topped our soup with sliced green onions, croutons, and parmesan cheese.
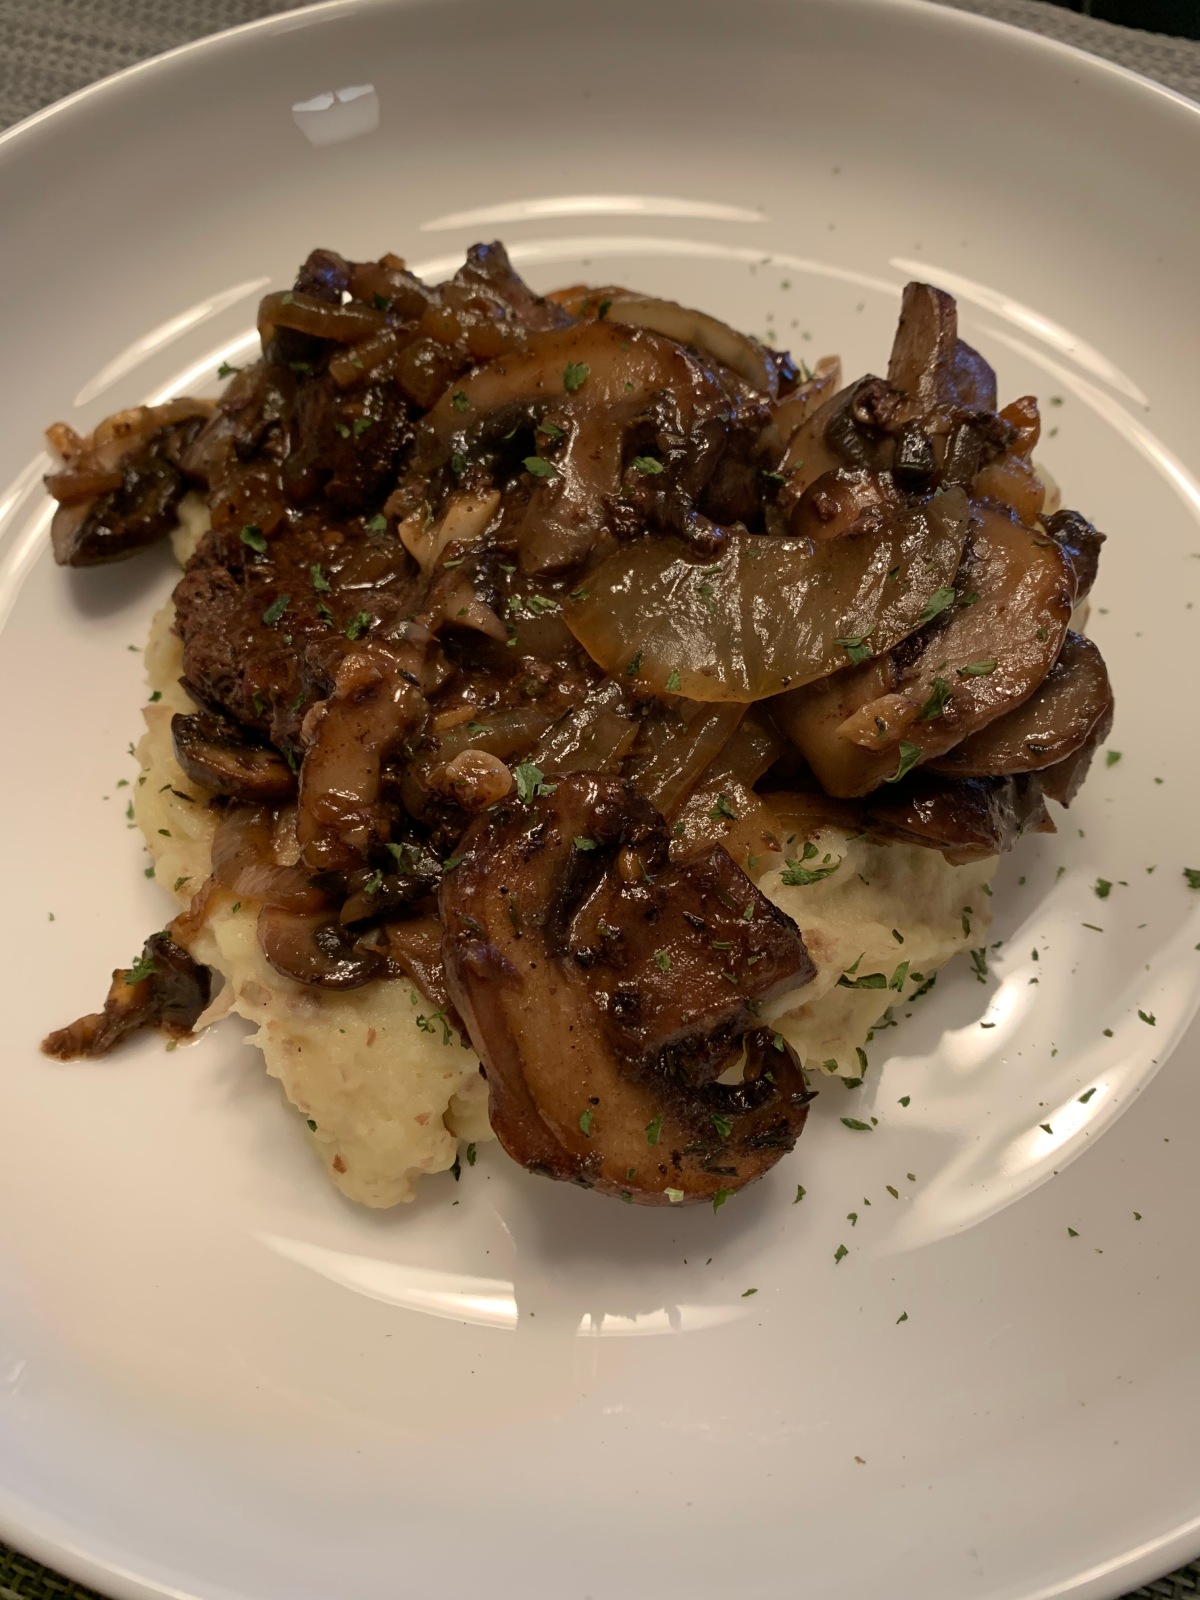
Last night I moved some lean ground beef burgers to the fridge to thaw so I could use them as my protein tonight. At first I had planned on making patty melts (basically cheeseburgers on regular bread since I didn’t have any hamburger buns) but then I realized I had mushrooms in the fridge as well! I decided to use the burger patties in salisbury steak instead that way I could utilize the mushrooms.
I paired the salisbury steaks with mashed potatoes and a caesar salad. You can’t have caesar salad with croutons, so I toasted up 2 slices of bread with olive oil and herbs to make some quick croutons.
In about 30 minutes dinner was served and it was the hearty, meaty, stick to your ribs meal that I was craving, but with less calories:)
Salisbury Steak
What I love about this recipe is that you get a rich mushroom sauce without all the cream and butter that is typically in a rich salisbury steak.
Season beef patties on both sides with salt and pepper.
Heat a large heavy bottomed skillet (iron skillet works great) with 1 TBSP olive oil.
. Once the pan is hot, brown the beef patties on both sides, 2-3 minutes per side depending on the power of your stove. Don’t worry about cooking them the entire way through at this point because they will finish cooking in the sauce later. Remove from pan.
Add 1 TBSP oil to pan. Add mushrooms, onion, garlic, and salt and pepper to taste. Allow the mixture to brown slightly and pick up the tasty meaty bits on the bottom of the pan (3-5 minutes).
Add about 2 cups of beef stock and dried thyme. You can add more stock here if you want a thinner sauce. Bring to a simmer and add cornstarch (if you used more stock, add a little more cornstarch here. You can’t mess it up- thin with more stock, thicken with more cornstarch. Just keep in mind that you have to cook it a bit before it starts to thicken from the cornstarch. This won’t happen right away). Stir until the cornstarch dissolves and add the beef patties back into the sauce.
Simmer the sauce and patties until the sauce is the thickness that you want and the patties are cooked through. For me it took about 5 minutes. Simmer longer or shorter until your desired sauce consistency. Serve over mashed potatoes.
Mashed Potatoes
To make these potatoes lower in fat and calories, I used chicken stock to flavor and thin them rather than milk and butter. I added a splash of fat free half and half and about 1 TBSP of low-fat sour cream to give some creaminess.
Caesar Salad
I toasted 2 slices of bread with about 1 TBSP of olive oil, salt, pepper, and dried thyme. I stirred them occasionally until they were crispy. For the salad I used romaine, tomatoes, parmesan cheese, croutons, and store bought caesar dressing. Right before serving I topped the salads with fresh pepper. Easy!
Caesar salad with fresh croutons.
I’m so happy with how this meal turned out. It was a great use of the ingredients I had on-hand and now I’m really looking forward to the leftovers for lunch.
I’m always intrigued by the variety of salsas and dips that you get at Latin American restaurants. Every restaurant has their own special salsa and each one is unique. I enjoy the creamy jalapeno dip at the local tex-mex restaurant, as well as the chunky tomato salsa from the Salvadorian restaurant down the street. About a year ago we tried a new Mexican food restaurant known for their tacos and they served us a smoky black bean dip that our entire table devoured. I did my usual thing where I taste it and take mental notes of the flavor profile so I can attempt to recreate it at home. I remember noting the smoky flavor which I thought could be coming from some chilies in adobo sauce.
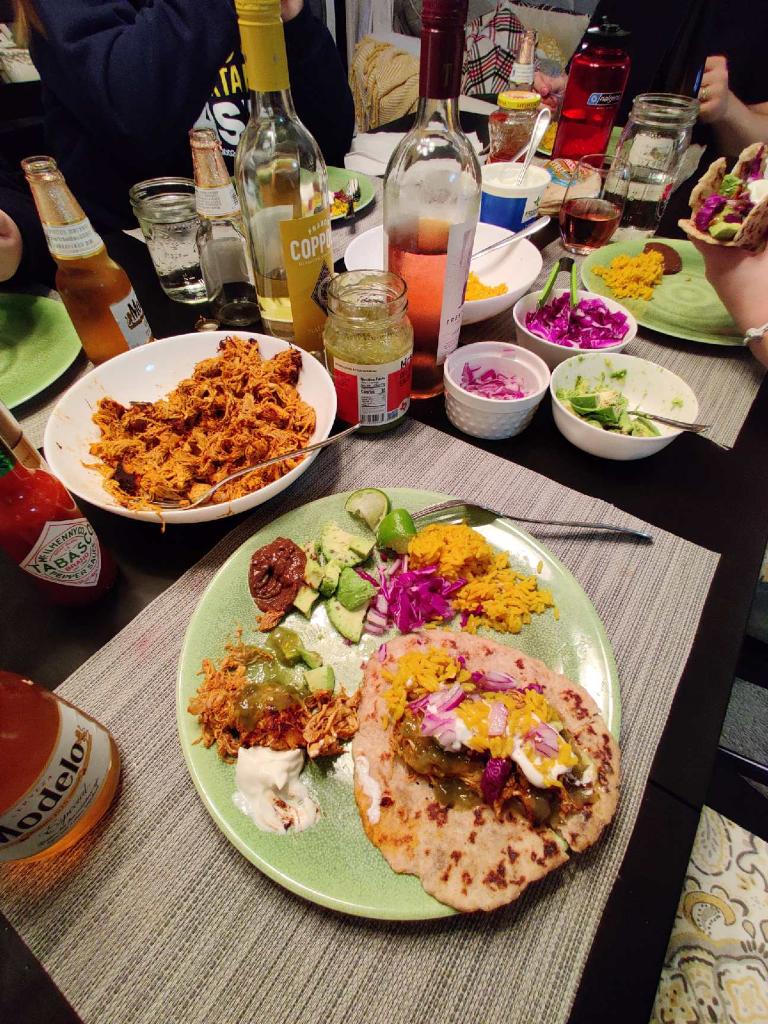
Last night we had some friends over and I made the chicken tinga tacos from Pinch of Yum. The recipe called for chilies in adobo sauce and when I had some leftover after I remembered this black bean dip and thought I would try to recreate it. 1 can of black beans, 2 chipotle chilies in adobo sauce, 1 garlic clove, 1 tsp of salt and 1 TBSP of olive oil pureed together left me with the flavor profile I remembered from the dip we were served at the restaurant. It was the perfect compliment to our taco dinner.
I served the tacos with avocado, Spanish rice, cabbage, sour cream, green salsa, limes, and red onion. I also made sourdough tortillas to go along with some smaller street taco size flour tortillas I picked up at the store.For dessert I served mini lemon tiramisus that I prepared in shot glasses. I had leftover ingredients from making this dessert for Valentine’s day and the shot glasses served as the perfect little vessels for this layered dessert. *Special shoutout to my friend Jenn for getting some pictures 🙂
Having friends laughing and sharing food around my table fills me with so much joy. It’s how I love on my people. What better way to say “I love you” than with tacos and beer?
I find that I’m the most successful at eating healthy throughout the day when I can start my day of with a healthy breakfast. Typically I don’t have time to make breakfast in the morning, and I’m not really hungry yet when I have to leave the house for work. I drive right past a dunkin donuts on my way to work, and it’s too easy for me to stop there to pick up a breakfast if I don’t already have something ready to go in the morning. So it is a lot more benefitial for my waistline (and my budget) for me to prep breakfast the night before so I have no excuse to stop for something on my way to work.
My Make-Ahead Breakfast Plan
I try to plan and prep my breakfasts over the weekend and I plan on having the same thing every morning to save on prep time and to lesson my decision fatigue. Here are a few of my favorite make-ahead breakfasts:
Individual Frittatas- I make these muffin tin frittatas a lot. I use whatever veggies I have on hand and i’ll often mix in some sliced ham, or cooked bacon. They also freeze well so I’ll double the recipe and keep them in the freezer to have for breakfast over a few weeks.
Morning Glory Muffins– These muffins have some fruits and veggies packed in, as well as whole grains. I’ve also found these to freeze well.
Yogurt with Fruit and Granola- This can’t really be eaten on the run, but if you can take your breakfast to the office this one will work! It’s a lot cheaper if you buy the larger yogurt container and just portion it out at home but you can also buy the individual yogurts.
Want a crazy easy hack for traveling with yogurt? Put it in a wide mouth mason jar but make sure to leave about 3 inches at the top. Add your granola to an empty plastic applesauce container and put it in the top of the mason jar. It fits right in! Then you can put the mason jar lid and ring on. It seals everything together and keeps your granola from getting soggy but you can still portion it in advance. Try this hack with veggies and dip as well!
Protein Boxes
Lately I’ve been having protein boxes inspired by the ones you get at Starbucks but for a FRACTION of the price. I sometimes adapt them to have for lunch as well. I try to put 2-3 boxes together at a time depending on my ingredients and whether or not they can be prepped in advance. Apples for example will brown quickly, so I slice those the night before and toss them with a little bit of lemon juice and water to minimize the browning.
Packing Your Ingredients: There are some great containers out there that are already broken up into sections like these glass containers. They work great for separating dips, peanut butter, or berries from things like eggs and veggies. These silicone muffin cups also work well to place inside dishes to separate ingredients.
Ingredient Inspiration: Here are some ideas of ingredients for your boxes, but the possibilities are virtually endless. Pick what you like and what you’ll be excited to eat.
Cheese
Hard boiled eggs- made in my instant pot using this method
Whole wheat sandwich thins
Sliced apple
Berries
Clementines
Grapes
Peanut butter
Veggies
Hummus
Crackers
Mixed nuts
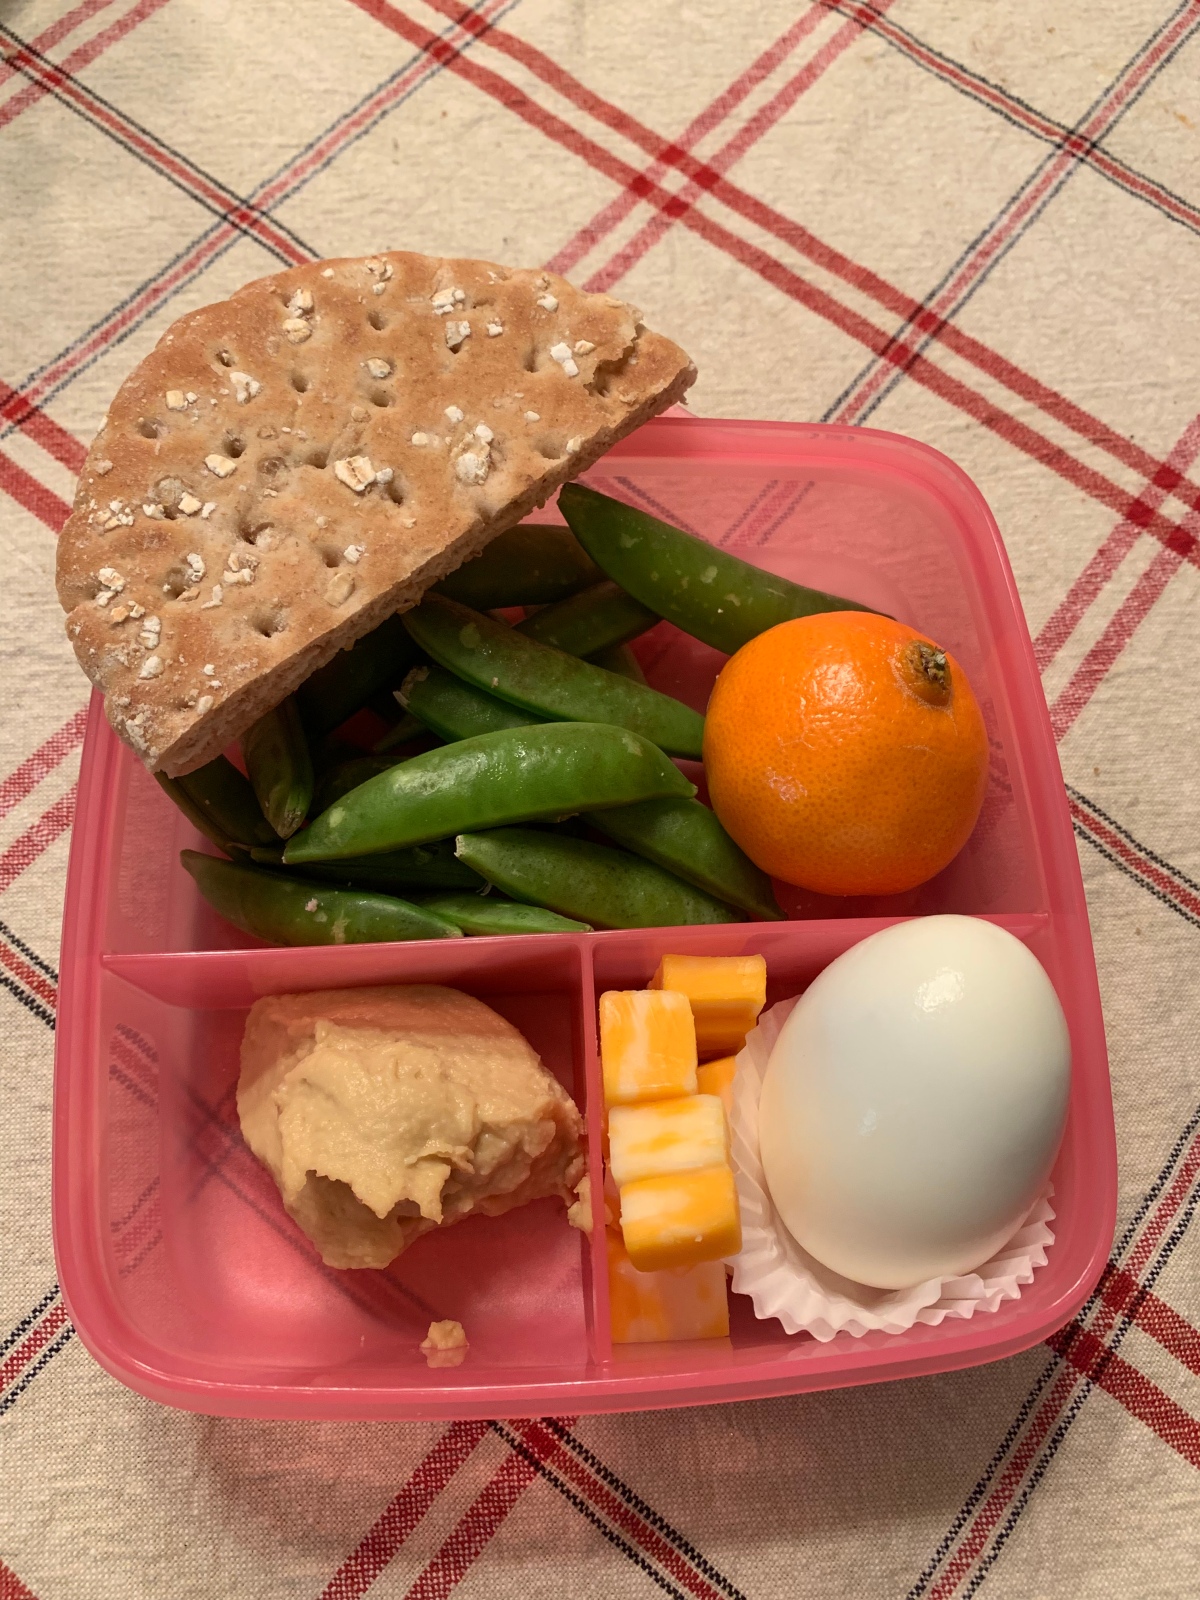
My boxes for this week include a hard boiled egg, 1 oz of cheese, half of a whole wheat sandwich thin, a clementine, 1 TBSP of hummus, and some sugar snap peas. I end up eating this around 9:30-10:00 am so I don’t mind the more savory peas and hummus.
I try to fill my boxes with things that I’m excited to eat and that will provide me with fuel for my day. This box combines whole grains, proteins and natural sugars to help me feel satisfied and full, and I look forward to eating it! This helps me to say no to the temptations like donuts in the office 🙂
These boxes would also be great as snacks for kids when they get home from school, or something quick to grab as you’re walking out the door on your way to soccer practice.
What are some things that you make ahead for breakfast? What are your ideas for elements to incorporate into a breakfast/lunch protein box?
Happy New Year everyone! It’s so hard to believe we’re in a new decade!
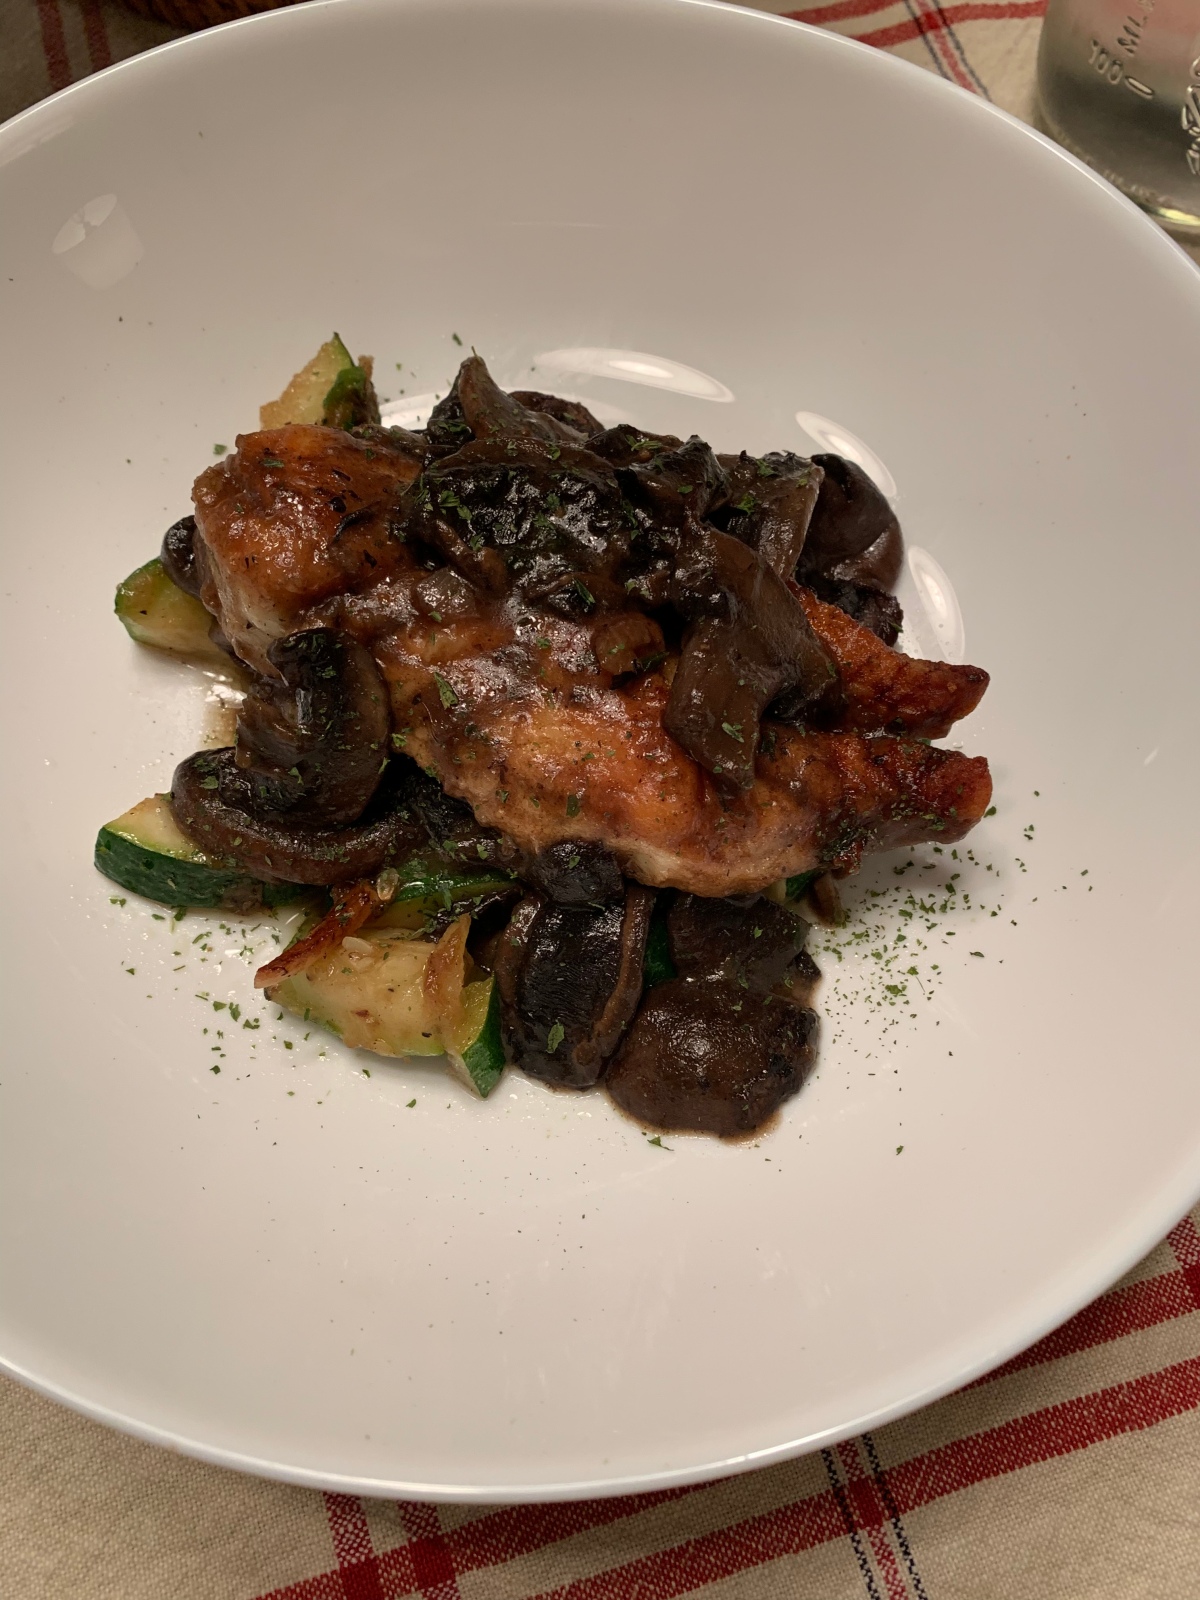
I’m going to share a quick and easy skillet chicken recipe that comes with a thick mushroom sauce. If you’re not a mushroom fan, reduce the mushrooms to 12-14 oz. I pack 16 oz into this dish for four servings. Baby bella mushrooms are some of my favorite to cook with, but use what you have or what looks good at the grocery store. It creates a thick savory mushroom sauce that goes great over pasta, mashed potatoes, rice, or a bed of veggies. I served mine over some sauteed zucchini tonight for a healthy alternative to the base of carbs. Enjoy!
Skillet Chicken with Mushroom Sauce
Start by slicing the chicken breasts horizontally so you have 2 thin cutlets per breast. You can also purchase cutlets, but I find them to be too thin, and often too small. Depending on the thickness once you slice the chicken, you may need to lightly pound the cutlets to make them thinner. I do this by placing the chicken in a zip-top bag and lightly pounding it with a rolling pin. You want your chicken to be about 1/4 in thick when you’re finished. Salt and pepper both sides of the cutlets.
Place the flour in a shallow dish. Dredge the chicken in the flour making sure to shake off any excess. Transfer to a plate. Reserve about 1 TBSP of flour for the sauce.
Heat a large skillet over medium high heat with the olive oil and butter. I like cast iron because you can get a good sear. Make sure your pan is hot by testing the tip of the chicken. I normally dip the edge of the chicken into the pan and listen for the sizzle. When you hear the strong sizzle, then you know the pan is ready. Once your pan is hot and the butter is melted, brown your chicken for about 2 minutes per side. Cooking time varies based on your pan but you want a nice golden brown sear. You’re not cooking them through entirely at this point, so just focus on the browning. Remove chicken from the pan and set aside.
Add garlic and shallots to the pan and cook for about 30 seconds, making sure to stir so it doesn’t burn. Add mushrooms and season with salt and pepper. Cook for 3-5 minutes. They will release their liquid, but keep cooking them until almost all the juices have cooked off. Sprinkle in about 1 TBSP of the leftover flour from the dredging step. Add chicken stock and parsley and scrape down the bottom of the pan to pick up the browned bits.
Add the chicken back into the pan. Cover and simmer for about 5 minutes until the chicken has cooked through. Add more stock to thin the sauce if you want. The sauce will be thick.
Serve over noodles, with rice, or over a bed of sauteed zucchini.
Sauteed Zucchini
I served the chicken and mushrooms over sauteed zucchini. To do this I chopped the zucchini into 1/4 in chunks. I heated a pan (iron skillet again) with about 1 TBSP of olive oil and added 1 minced garlic clove and 2 TBSP of minced shallot. I cooked that for about 30 seconds then added the zucchini. Let the zucchini hang out in the pan for 1-2 minutes without stirring or disturbing it. This helps to create some nice browning. If you overfill your pan, then the zucchini won’t brown, it will steam so make sure to use a pan large enough to have an almost single layer with minimal overlap. Then I stirred them, covered the pan, and cooked them on low for about 5 minutes to finish cooking.
This is a quick dinner that I have made numerous times before. I have served it over egg noodles, with a side of rice, or with mashed potatoes. It was just as good tonight served over the zucchini, and I didn’t feel any guilt after enjoying a nice big bowl 🙂
Friendsgiving was wonderful this year. Great food, great friends, great conversation. I went to bed that night with a full belly and a full heart. The next morning we woke up and went to church where I heard a song that brought me to tears because it spoke so closely to my heart, and the things that are important to me. The song is titled “Crowded Table” by the Highwomen. Wow! Here are the lyrics for the chorus of the song:
I want a house with a crowded table
And a place by the fire for everyone
Let us take on the world while we’re young and able
And bring us back together when the day is done
Later the song talks about planting a garden and letting the roots of happiness run deep. It talks about having an open door, where everyone is welcome.
I want this song to by my anthem. I want my home to have a crowded table, where everyone has a place and where we can all come together to relax and regroup after a long day.
Friendsgiving was a small way of me living out the meaning of this song. I had so much fun planning and preparing this meal and sharing it with people I care about. Below are the recipes I used, and a timeline for how I planned out the day. I hope it inspires you to crowd your table not only this Thanksgiving, but throughout the year.
Disclaimer- In the excitement of Friendsgiving, I failed to get pictures of most of the dishes. I guess you’ll just have to make everything yourself to see what it looks like 🙂
Recipes
Turkey: I followed Bon Appetit’s recipe for “Expertly Spiced and Glazed Roasted Turkey“. Two nights before the meal, I broke down the turkey into various cuts: breast, leg and thigh, and wings. Then you generously sprinkle the skin with a salt brine and let it sit in your refrigerator, uncovered, for at least 24 hours but no more than 2 days. I made sure to bring the turkey out about 2.5 hours prior to cooking it so it could come to room temperature. This helps it to cook more evenly. Then there is a glaze with soy sauce and orange zest that you baste on about every 20 minutes. Since you’re baking it on a sheet pan and the turkey has been deconstructed, you’re left with all the pieces having nice crispy skin but it wasn’t dried out. Even the leftover breast meat was still juicy today when we had it for leftovers. I can’t recommend this recipe enough! I plan on trying it on chicken sometime soon.
Stuffing/Dressing: My family has never been the kind to stuff the turkey. We like to have “dressing” instead, and it usually has a cornbread base. This year I tried New York Times’ recipe for “Rich Cornbread Dressing“. The recipe calls for optional oysters, but I didn’t include those. It’s a base of half cornbread and half crusty white bread. It’s bakes up almost like a custardy bread pudding, but it’s rich in flavor and had a texture that held up well to full gravy overload. I baked mine in the morning, cooled it and refrigerated it. Then I pulled it out to bring it to room temperature when my turkey had about 30 minutes to go. Once the turkey was out, I put the dressing in the oven covered in foil at 350 to warm it.
Stock & Gravy:
Stock– Since I broke down the turkey this year rather than cooking it whole, I was left with the backbone which was still full of meat and fatty skin. I also had the neck from the turkey to utilize. I put all the leftover turkey parts in my pressure cooker with 1 onion, 1-2 TBSP pepper corns, 1 TBSP salt, and a small handful of bay leaves. I covered it with water and set it to pressure cook for 1 hour. I then let the pressure naturally release. I was left with a rich broth that was perfect for making gravy. I did this two nights before the meal, and just kept the stock in the fridge until the morning of to make my gravy. You could totally make the gravy ahead of time as well and just reheat it.
Gravy– Normally I use the pan drippings from the turkey to make gravy, but since there were a lot of strong spices in the rub and glaze of the turkey this year, I didn’t want that to overpower everything on the plate by those flavors also being in the gravy. That’s why I decided to make my own stock and use that as the base for my gravy.
I melted 1/2 cup of butter in a saucepan and added 1/2 cup of flour. Add it slowly and whisk the whole time to help prevent lumps. Continue to whisk and cook this over medium until you’re left with a mixture that resembles the color of peanut butter. Congratulations, you just made a roux! A roux is typically equal parts fat (butter) and flour cooked together, and it’s the base to a lot of creamy sauces.
Once you have your roux, slowly whisk in ROOM TEMPERATURE stock. Don’t mix cold stock into your hot roux, or you risk creating more lumps. Add about 4 cups of stock to this mixture and whisk until smooth. Bring it to a boil and simmer until it’s uniform. Then you can refrigerate it and warm it on the stove when you’re closer to meal time. This will solidify in the fridge, so you might have to thin it out with more stock when you warm it on the stove. Add more or less stock to make your gravy more/less thick.
Sweet Potatoes: This recipe is less precise because my Aunt taught me how to make it, and I make it by sight/feel. But here is how I do it!
Peel and quarter your sweet potatoes (cut them like you would a potato wedge). I used 5 large potatoes and that easily fed 7 people with leftovers. Place them in a large saute pan. Add 1/2 cup of butter, 1/4 cup of Karo light corn syrup, 3/4 cup-1 cup of brown sugar and then enough water to cover the potatoes. Simmer them until they’re fork tender. You want the sauce to be thick like a syrup, so if the potatoes are done before that point just transfer them to your baking dish and continue to reduce the sauce. Transfer the potatoes and sauce to a baking dish and top with marshmallows. Broil for a few minutes until the marshmallows are toasted.
Thanks Aunt Debbie for teaching me how to make your sweet potatoes 🙂
Cranberry Sauce: I have been making Ina Garten’s “Make-Ahead Cranberry Sauce” recipe for a few years and I love it! It has orange juice and zest in it and I love the citrus notes that come out in this sauce. It’s a must have on my holiday table.
Rolls: Homemade rolls are always a highlight of the holiday table with my family. Some of my favorite cooking memories are shared in my Aunt Debbie’s kitchen, rolling out the bread dough and shaping it into crescents. A few of us work together to roll out the dough, brush it with butter, and shape it into crescents. Then it’s like playing tetris, trying to find a large enough work space to lay out the baking sheets full of crescents as we wait for them to rise. They’re the last thing to go in the oven right before we eat, so when the rolls go in you know it’s almost time! These rolls have become known in our family as “Debbie Rolls” and when it comes to family recipes, it’s easily in my top 5.
But! I will not be sharing that recipe with you today 🙂 I don’t often make Debbie Rolls at home on my own because they are more time consuming to roll out and shape. They also require more oven space to bake multiple sheet trays. Since I don’t have as many hands helping me in the kitchen when I host meals, I usually make a dinner roll where I can fit all of them in one baking dish. Saves me time, and oven space.
I found this recipe for Honey Butter Rolls from Sally’s Baking Addiction a few years ago and it’s become my go-to quick dinner roll. I’ve made them before and they’re a great quick roll recipe that I can bake in one pan. I bake them all in a 9×13 and the get nice and puffed but still pull apart nicely once they’re baked. They’re wonderfully soft on the inside and basically melt in your mouth. Plus you can freeze them! I get to the point where I shape them into rolls, then I place them on a baking sheet and freeze it until they’re solid. Then I put the frozen rolls in a ziplock bag. Pull out as many you need for you meal and you have fresh rolls! I pull them out the night before and place them in the baking dish in the fridge to thaw overnight. Then I bring them to room temperature about 1.5 hours prior to baking.
Mashed Potatoes: Hmmm… I boil potatoes, then mash them with butter and milk and salt and pepper to taste. 🙂 But seriously. I boil peeled potatoes in salted water with a few cloves of garlic. Once they’re fork tender, I drain them and put them in my stand mixer. I use the paddle attachment to beat the potatoes until smooth, adding butter and milk or cream to reach my desired consistency. I usually add about 1/2 cup of greek yogurt or sour cream as well to 5 lbs of potatoes. It just adds a nice tang. Make sure to salt and pepper the potatoes well. Be fancy and garnish with some chives or parsley!
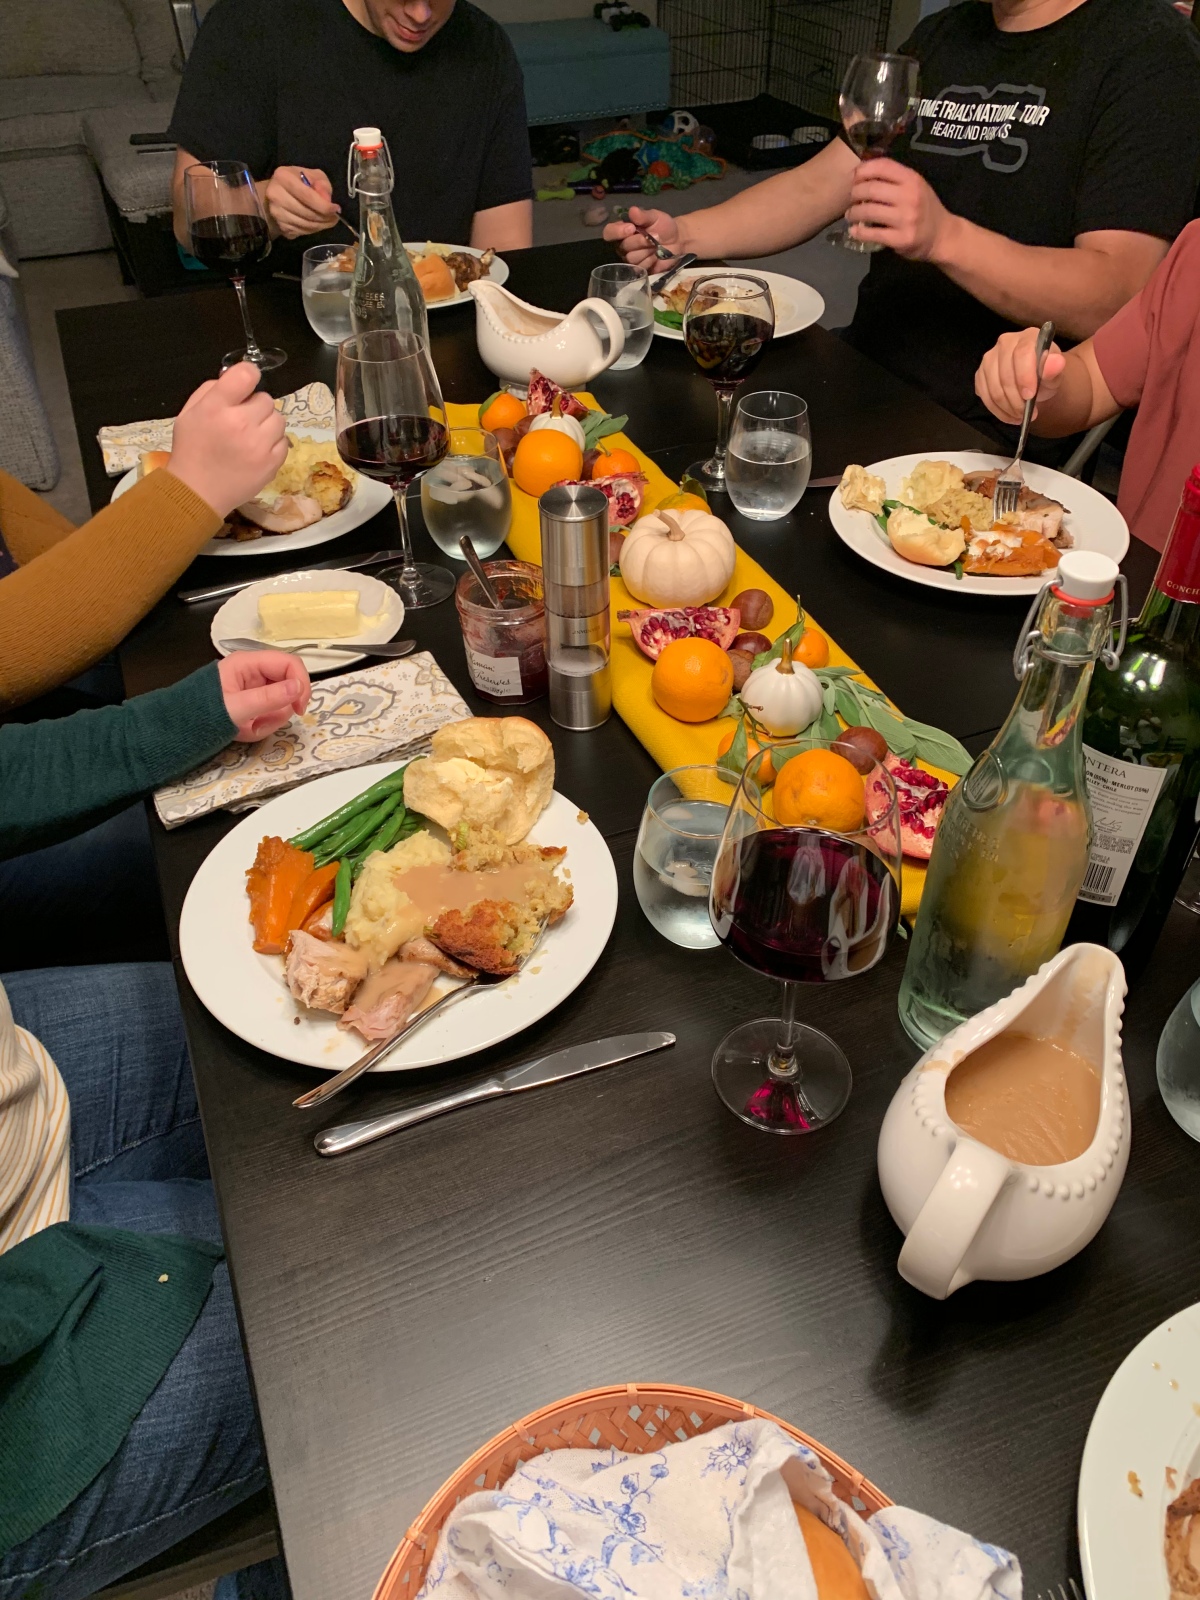
Table Setting
My dining room table isn’t large enough to seat everyone and serve the food, so I put the food on a separate buffet table. Then I have room to decorate a table runner on my dining room table. This year I went with almost all edible decorations including chestnuts, sage, pomegranates, and mandarin oranges. I kept each place setting simple with a folded cloth napkin placed on every plate. Once the meal was finished, we started snacking on the fruit from the table. Everyone loved the pomegranates!
Prep Plan
Two Nights Before: Dry brine the turkey and make your stock.
One Night Before: Bake cornbread, and prepare cranberry sauce.
Day Of: Follow my attached PDF for my Day-Of Thanksgiving Timeline. It’s a detailed timeline for how you can execute the recipes I listed above to serve a meal at 6 pm.
Our friends brought deserts, wine, and green beans to complete our meal. One of my friends makes a delicious cranberry pie that I think is going to have to be a permanent resident on the Friendsgiving menu.
In the spirit of Thanksgiving, I want to thank my friends and family and all of those who have shared meals at our table. Having you in our home brings us so much joy. I am thankful for my “crowded table”.
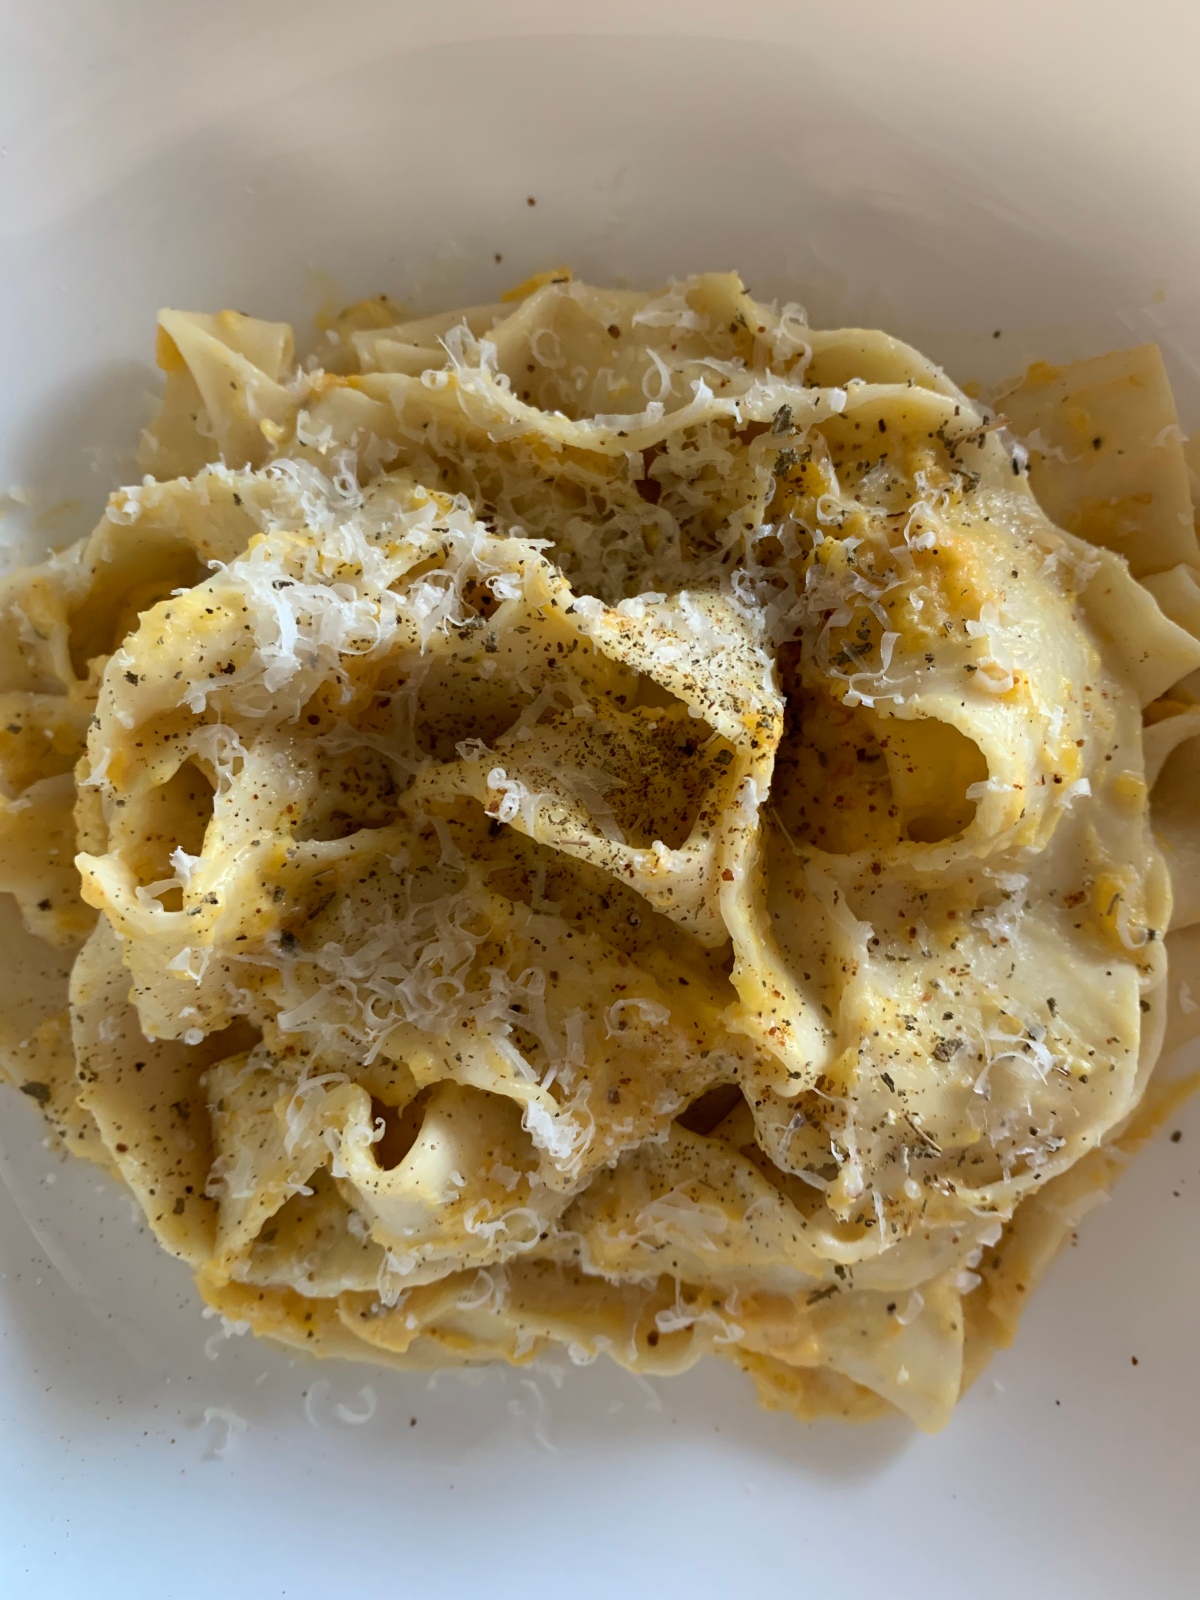
Fresh pasta with pumpkin = fall comfort food. I roasted a pumpkin earlier this week, and after enjoying the roasted seeds I was left with a decent amount of puree to use in recipes this week. I’ve been seeing a lot of recipes for pastas with pumpkin being posted lately and thought I would give it a try!
Fresh pasta really isn’t that difficult, and you only need 4 ingredients: egg, flour, salt and water. It can be a weeknight meal! Fresh pasta is so tender. Once you taste it you won’t want to go back!
Fresh Pasta
Mix 1 cup of flour and 1/2 tsp of salt in a bowl. Make a well in the center and crack in 1 egg. Lightly beat the egg with a fork, gently pulling in flour as you mix it. Add about 1.5 TBSP of water to help form a dough and knead it for a few minutes. The dough will be somewhat tough but it will come together as you roll it out. Divide the dough in half to begin rolling through your pasta machine. If you don’t have a pasta machine, you can use a rolling pin to roll the pasta to your desired thickness.
Roll it out with a rolling pin, or use a pasta machine. The first few times you roll it through the machine it might crack around the edges. Fold the strip in thirds and run it back through the machine, continuing at the thickest setting until you have a smoother sheet. By folding it in thirds and running it through again you will end up with smoother edges that roll through easier. Then roll the sheet through each of the settings, making the sheet thinner and thinner until you’ve ran it through the final setting.
You will be left with a long thin sheet of pasta. You can use a pasta cutter on a pasta machine, or just cut the pasta by hand. I like to cut it by hand because I like the more rustic looking noodles. I fold the long sheet into thirds again, making sure the sheet is lightly floured so it doesn’t stick to itself. Then I slice the sheet into my desired width of noodle. Then when you unfold the sheet you’re left with longer noodles of more consistent widths.
Lightly dust the noodles with flour after cutting them so they don’t stick together.
Fresh pasta cooks a lot faster than dried. These fettuccine noodles cook in about 2 minutes! Make sure your water is properly salted prior to boiling your noodles.
Creamy Pumpkin Sauce
Saute 1 chopped garlic clove in some olive oil over medium heat. Add about 1/3 -1/2 cup of pureed pumpkin, 1/4 tsp dried sage, a pinch of nutmeg, salt and pepper. Cook for 1-2 minutes until combined. Add 1/2 cup half and half and stir to combine.
Transfer the cooked pasta to the sauce and continue to simmer over low heat for 1-2 minutes. The sauce will continue to thicken and coat the pasta. Top with fresh parmesan and enjoy!
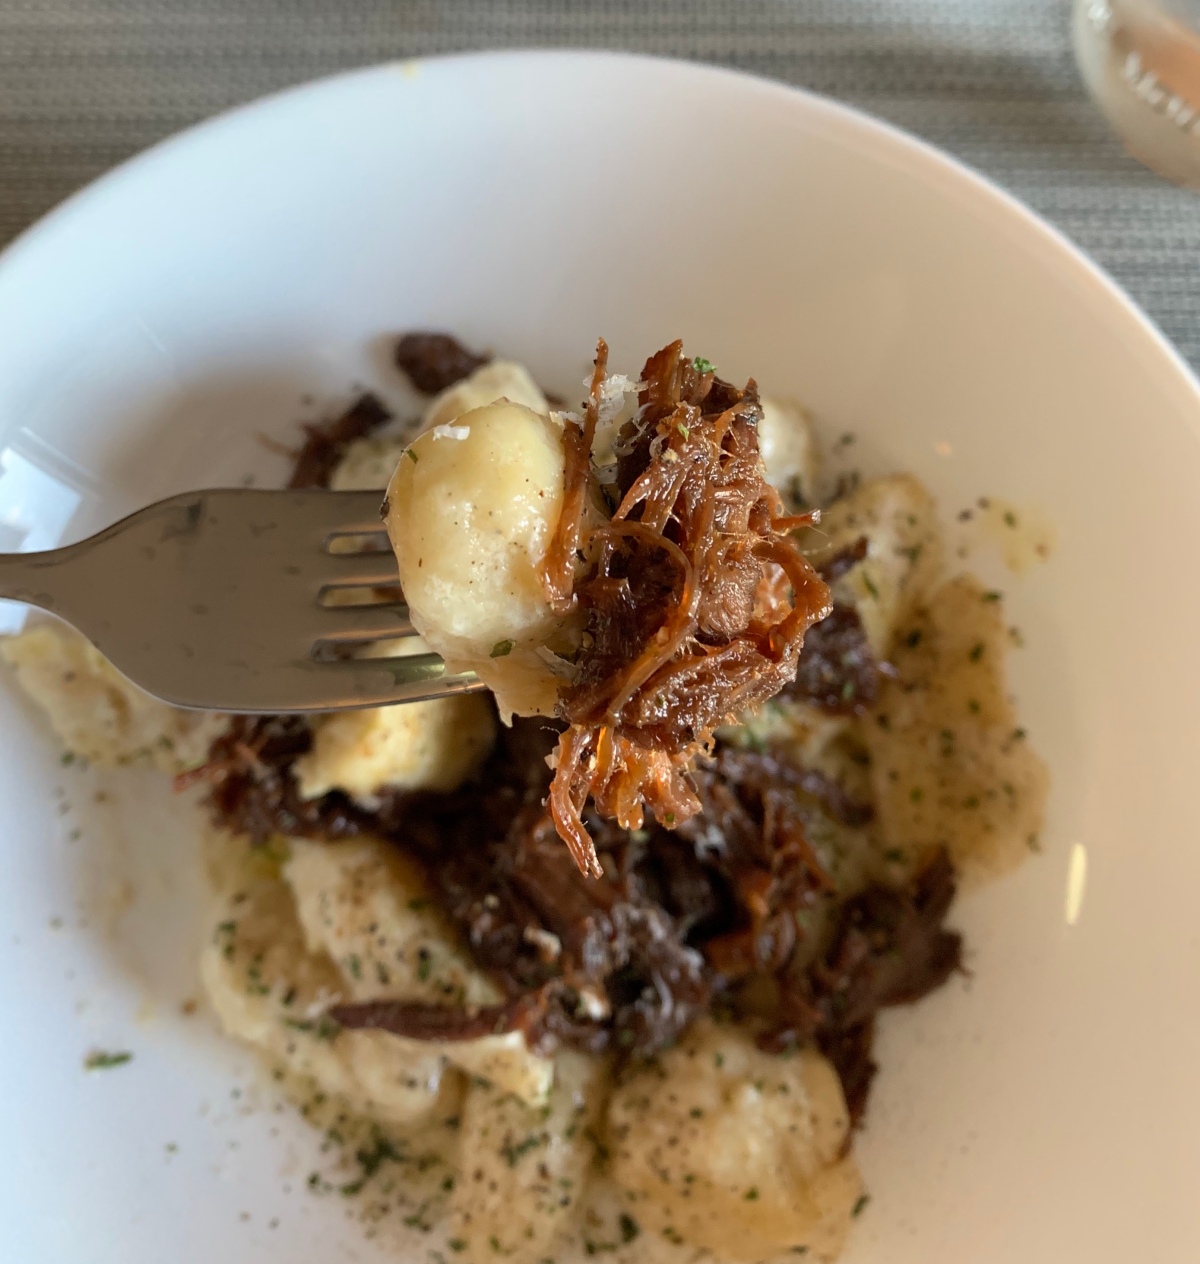
Tonight I was cooking for 1, and I had all intentions of coming home and eating a bowl of cereal while watching a chick-flick. When I turned on the TV, a cooking show came on and they were making gnocchi… I was inspired to stretch leftovers this week into meal 3! I used some leftover mashed potatoes from night 1, and the rest of the shredded beef from night 2, to create this comforting dinner for 1. Don’t worry, I didn’t eat it all, so my husband still gets a taste when he gets home 🙂
Make the Gnocchi
Take about 1 cup of leftover mashed potatoes, 1/2 cup of flour, 1 egg, and a pinch of salt and mix it together in a bowl until a rough dough forms. Transfer the dough to a floured clean countertop or cutting board and knead until a soft dough forms. You can add a little more flour to make the dough come together, but don’t add too much or your gnocchi will be tough.
Divide the dough into 3 sections and roll each section into a log, about 3/4 in. thick. Cut into 1 in pieces, cutting on the diagonal. Gently drop the gnocchi into a small pot of salted boiling water, and boil for about 2-4 minutes until they float.
While the gnocchi boil, melt 2 TBSP of butter in a small saute pan over medium heat. Once the gnocchi is cooked, use a slotted spoon to transfer them to the saute pan. Add 1/4 cup of half and half (or heavy cream if you have it) and about 2 TBSP of grated parmesan cheese. Crack some fresh pepper on top and simmer for a few minutes until the sauce coats the gnocchi. Transfer to a serving dish, top with remaining shredded beef and a little more grated parmesan. I added a little parsley and some more freshly ground black pepper.
Thoughts on Leftovers
I enjoyed this little game this week, of using my leftovers in new ways. Having a nice meal at home every night doesn’t mean you’re spending hours in the kitchen. Use what you have and be creative! Who knows what you’ll come up with, but I want to see it!
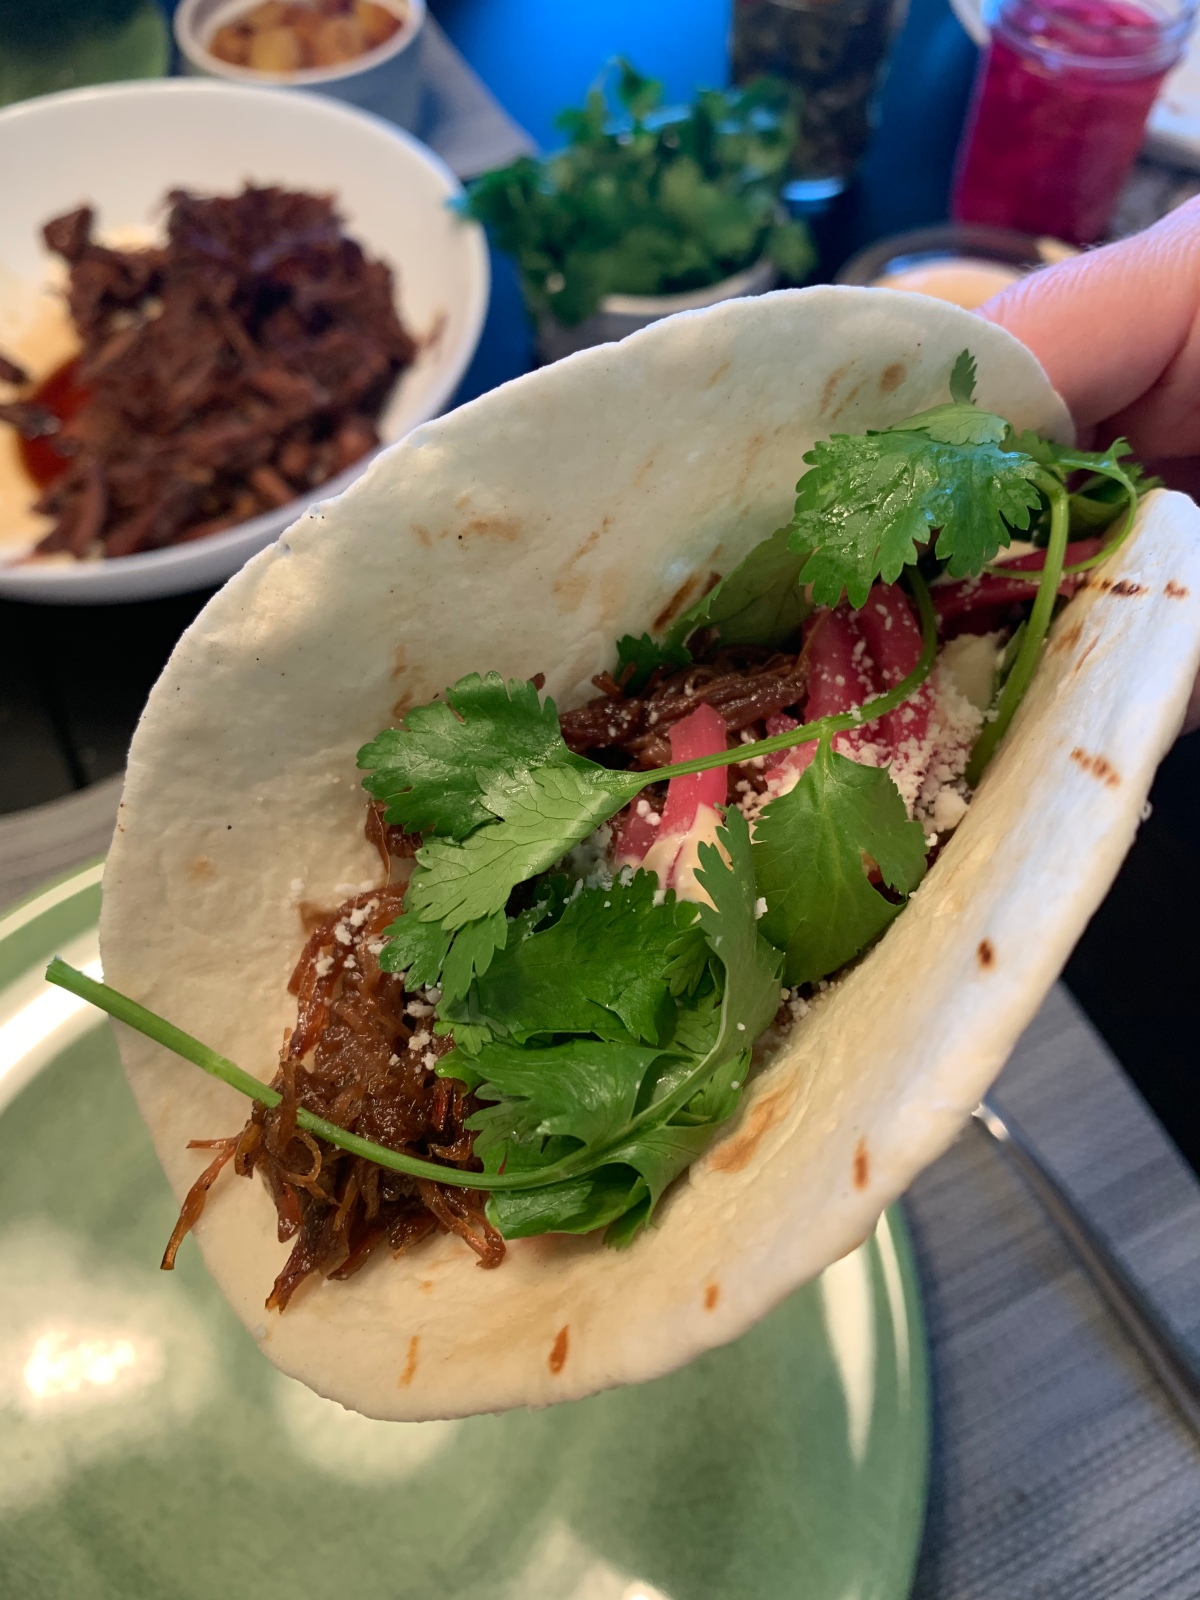
I love when a dinner serves double duty. I almost always make enough for dinner to have leftovers for lunch, but leftovers are even better when they can be adapted into a whole new recipe. This week I made a beef roast in the crockpot on the first night and served it with mashed potatoes and sautéed carrots. Then the next night I shredded the beef and mixed it with a soy ginger sauce for some asian-fusion tacos. I topped the tacos with cotija cheese, cilantro, and some spicy mayo. Here is how I did it:
Day 1- Morning
I salted and peppered the beef. Then I placed it in my slow cooker and added about 2 cups of beef stock. That’s it! Set it on low, and cook it for at least 8 hours (depending on how big your roast is). I cooked mine for 10 hours and it was about 2 lbs.
Tip- Some good cuts to use for roast are chuck roast, or bottom round roast. You will be cooking it low and slow, so the tougher (more inexpensive cuts) work great. Look for good distribution of fat within the cut of meat. This will all break down as it cooks and you will be left with a super tender roast.
Side note- I know a lot of crockpot roasts have you add the veggies in such as onions, potatoes, and carrots. Meh. I like it, don’t get me wrong, but there is nothing exciting to me about veggies lacking in texture and flavor after they’ve been cooked in the crockpot like that. I’ve come to enjoy crockpot roasts more when I cook the veg separately, so I can really develop the flavor and so they can maintain some sort of texture. Now, roasting the meat and veggies in the oven in a nice large cast iron dutch oven is a different story, but that’s a thought for another time.
The other reason I chose not to add veggies in with the meat is because I knew I would be using the beef in 2 different recipes and I didn’t want my tacos the next night to taste like potatoes.
Day 1- Evening
I prepped the sides and made the gravy. I chose to serve this with mashed potatoes and sautéed carrots.
Mashed Potatoes- When I make mashed potatoes I like to add butter, milk, and something tangy like sour cream or greek yogurt. I probably add about 1/4-1/3 cup of sour cream/yogurt to 4-5 cups of potatoes. I also throw in a few garlic cloves with the potatoes while I boil them. They soften and mash right into the potatoes adding a subtly garlic flavor.
Gravy- Once you have your potatoes on to boil, begin working on the gravy. Remove the meat to a cutting board and cover with foil to rest while you finish prepping. Ladle out about 2 cups of liquid from the crock pot and whisk in about 2 TBSP of corn starch. Whisk until no lumps remain, then slowly whisk that mixture back into the remaining juice in the crockpot. Depending on how much juice you have will determine how much cornstarch you need. Replace the lid and turn it up to high. Let this simmer while you finish prepping. Check it about 5 minutes later to see if it’s starting to thicken. If it hasn’t thickened at all, repeat the step and add more cornstarch. Thicken it to your desired consistency.
Sautéed Carrots- My friend showed me how to make these, and I love how simple and delicious they are. I used baby carrots this time, but you can use large carrots sliced into smaller pieces. Melt about 2 TBSP coconut oil to the pan and add your carrots. I cooked about 2 cups of carrots. Move them around in the pan, then put the lid on and cook them over medium until they soften. Once they’re almost there, remove the lid and let them finish cooking for 2-3 minutes. This helps them caramelize a little bit. I sprinkle in salt and some thyme. Done!
Reserve enough beef for tacos the next day and enjoy your roast dinner!
Day 2- Night
You can totally just shred the beef and serve it in taco shells with your desired toppings and you will have a great dinner. I like my shredded beef tacos with a soy ginger glaze.
Prepare the glaze (this makes enough for about 2 cups of shredded beef): Heat 1 tsp sesame oil in a small saucepan and add 2 cloves of garlic. Stir for about 30 seconds until fragrant. Add 1/2 tsp ground ginger, 2/3 cup water, 1/2 brown sugar, 1/3 cup low sodium soy sauce, 1 TBSP oyster sauce, and 2 tsp ground white pepper. Whisk together and bring to boil. Reduce heat and simmer until it begins to bubble and becomes thicker.
Add the beef: Shred the beef with your fingers or with 2 forks and add it to the sauce. Stir to coat and continue to simmer for a few minutes as the sauce continues to thicken.
Serve: I served them with cotija cheese, cilantro, pickled onions, pickled jalapeños, and a spicy mayo (mix mayo, lime juice, and sriracha to your desired consistency and heat level). I also grilled some pineapple chunks to go on the side and made these street corn croquettes. Finally, I lightly grilled the tortillas and it was time to eat!
I mean, who doesn’t love a good taco salad?! We have them a lot on weeknights because they come together quickly and all of the prep can be done ahead of time. A taco salad bar is also great for a crowd, especially when you’re trying to feed a lot of people who have various food allergies. I once made a taco bar for about 60 people at my church and everyone loved it. Here is how you can successfully prep and serve a taco salad bar to feed a crowd:
There were just 6 of us for this meal, so I just kept the meat warm on the stove until my friends arrived then I transferred it to a dish for the table. When I made this for 60 people, I pre-cooked all the meat and served it in crock pots. I use McCormick taco seasoning and just follow the package instructions. It will work with basically any ground meet such as beef, chicken, or turkey. We typically use a lean ground turkey.
I chop and wash all the romaine lettuce ahead of time and keep it in the fridge in containers lined with paper towels until ready to serve. This helps to soak up any residual moisture so you’re left with dry lettuce. Soggy lettuce is why salads at home never taste as good as a restaurant, so invest in a nice salad spinner. It’s a game changer!
Prep all your toppings such as onions, tomatoes, beans, cheese, corn and cilantro. Some pickled jalapeños would be great as well! Place them in your serving dishes and keep them in the fridge until your guests arrive. Then you just have to pull them out and put them on the table.
Serve with salsa and chips, and rice if you want.
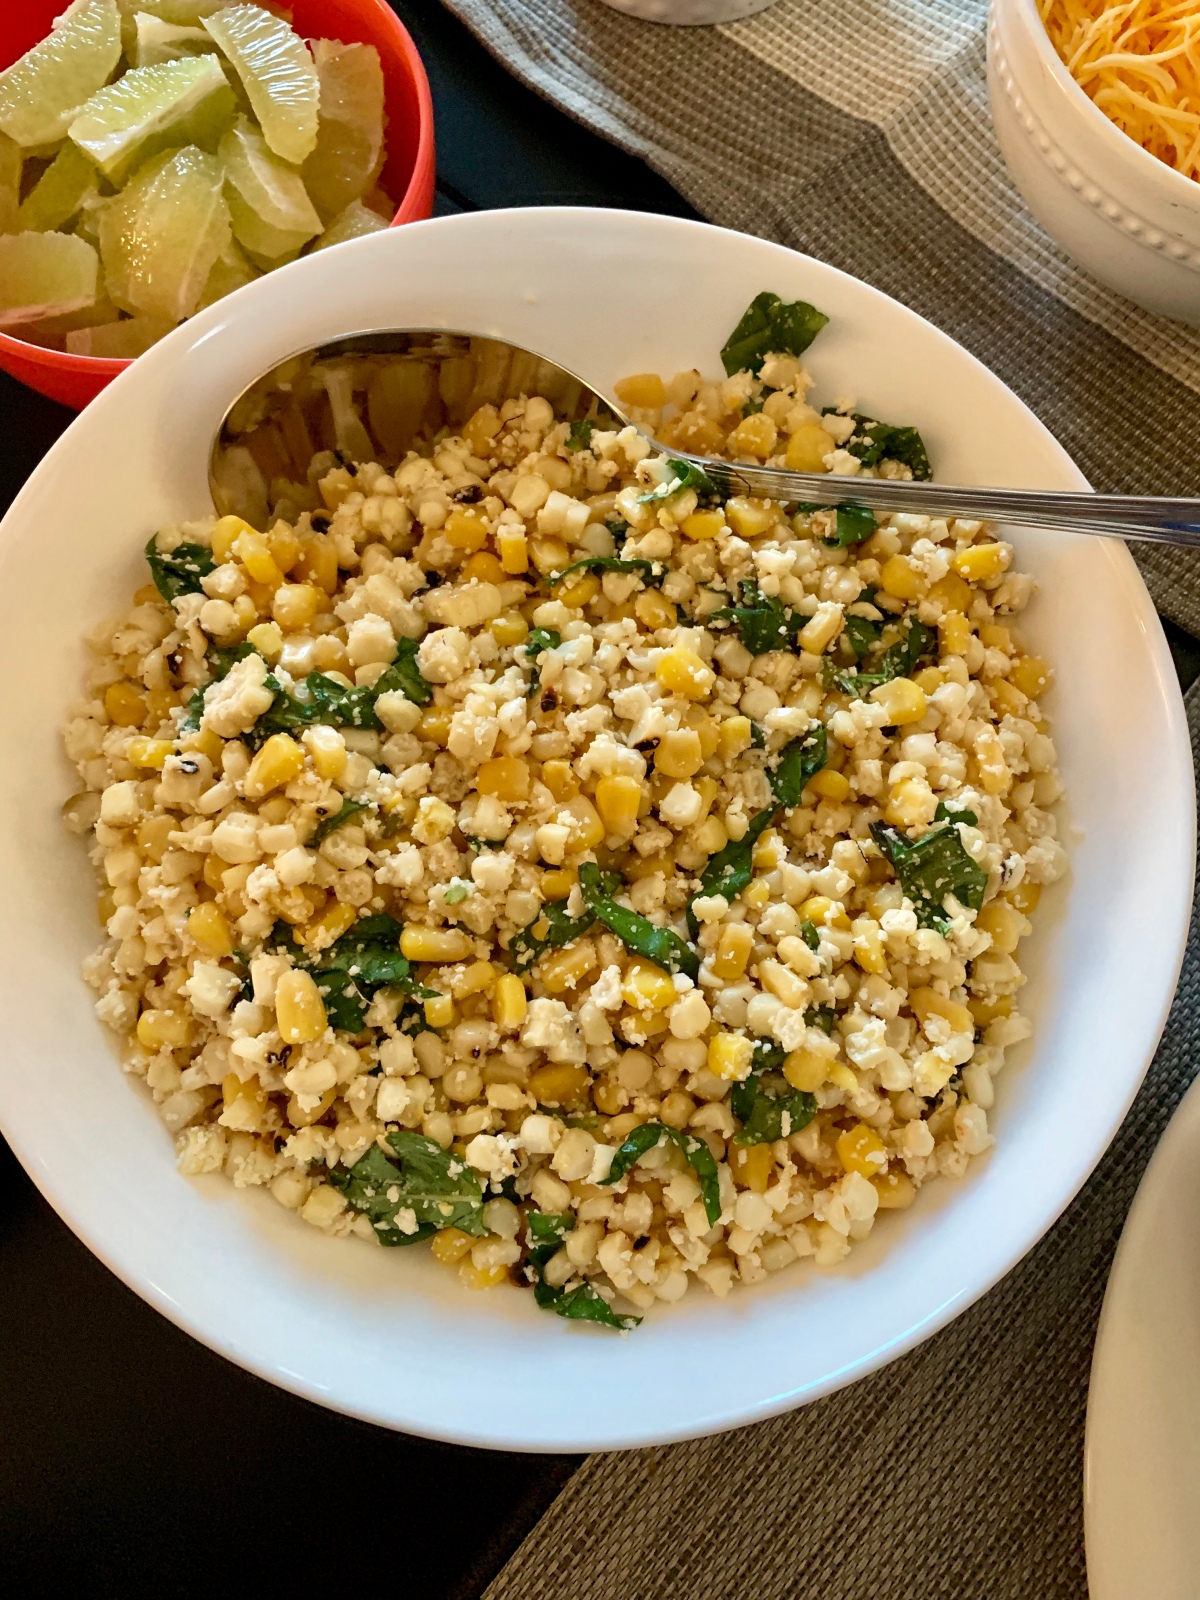
Grilled Street Corn Salad
I made a grilled street corn salad to go along with the taco salads. I had street corn for the first time at a local taco place and fell. In. Love! I love the combination of the heat from the cayenne, creaminess from the mayo, and saltiness from cotija cheese. Then at another restaurant I had it as a salad where there were virtually the same ingredients, just in a salad form with the corn cut from the cob. This was my inspiration for this grilled corn salad.
I also need to shoutout to my friend who is allergic to cilantro for inspiring me to be creative and use another fresh herb. I chose basil and wow! The basil in this salad was probably one of my favorite parts about it. I’m so thankful I didn’t use cilantro. It’s not a typical flavor in street corn, but I’m never going back.
Also, in case you have never seen this tip before, use a bunt pan to cut the corn off the cob. It sits perfectly in the center of the pan to hold it up while you’re cutting and the kernels fall nicely into the pan without going everywhere. Again, game changer.
So, here is my recipe for a grilled street corn salad with basil and cotija cheese. Enjoy!